

Overview
The Recruitment Module is used to manage job openings, hiring entries, and recruitment-related information within the organization. It serves as the central workspace for creating job postings, categorizing positions, tracking recruitment status, and preparing entries for publication in the Job Portal.
This module ensures a structured, transparent, and efficient hiring process by allowing HR teams to control job visibility, monitor recruitment progress, and maintain consistent recruitment data across the system.
Key Features
- Centralized job posting and recruitment management
- Recruitment status control (Draft, Open, Closed)
- Job categorization and labeling system
- Job Portal integration for public visibility
- Applicant application form and submission
- Search, filtering, and export to Excel
- SEO-ready meta description and keyword support
- Secure role-based access and audit logging
Accessing the Recruitment Module
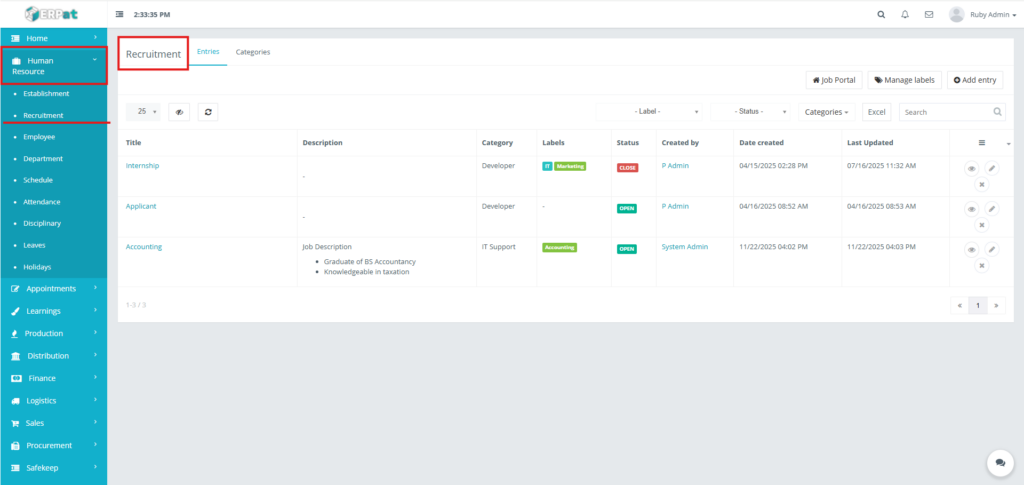
- Log in to the ERPat System.
- Navigate to Human Resource from the main sidebar.
- Select Recruitment.
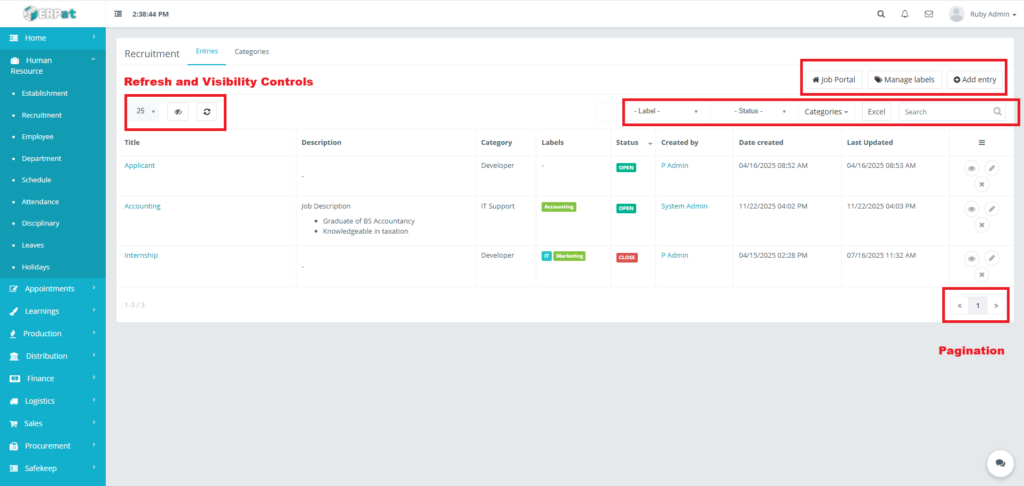
- You will be directed to the Recruitment – Entries page displaying all recruitment records.
You will be directed to the Recruitment page displaying all job listings.
Recruitment Tabs
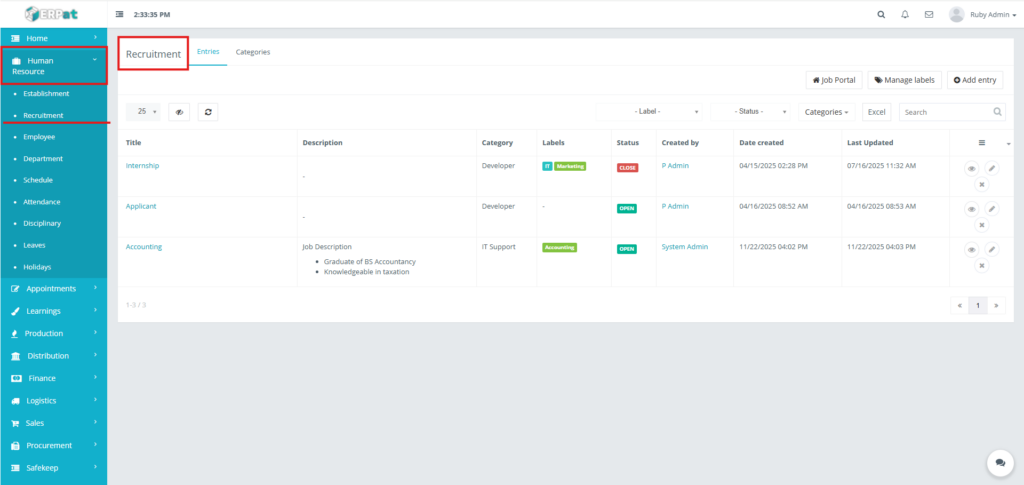
The Recruitment Module is divided into the following tabs:
- Entries – Displays all job postings and recruitment entries
- Categories – Manages job categories used for classification
Recruitment Entries
Recruitment Entries represent individual job postings or hiring requirements. Each entry contains job details, category, labels, status, and metadata used for internal management and Job Portal publishing.
Recruitment Job Listing Page
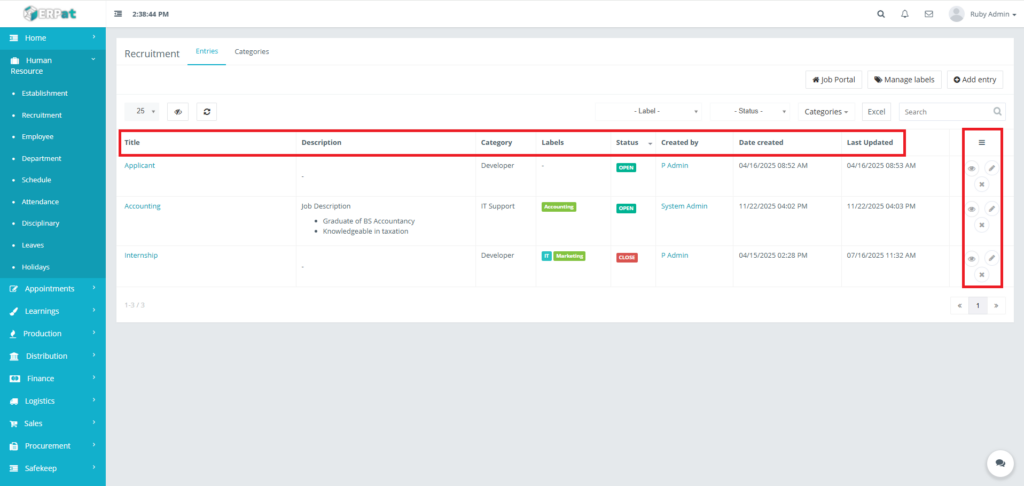
The listing page provides an overview of all recruitment entries with the following information:
- Title – Name of the job position or recruitment entry
- Description – Job description or qualification summary
- Category – Job category (e.g., IT Support, Developer)
- Labels – Custom tags such as Accounting, IT, Marketing
- Status – Recruitment state (Draft, Open, Closed)
- Created By – User who created the entry
- Date Created – Timestamp of creation
- Last Updated – Timestamp of last modification
- Actions – View, Edit, or Delete controls
Status Indicators:
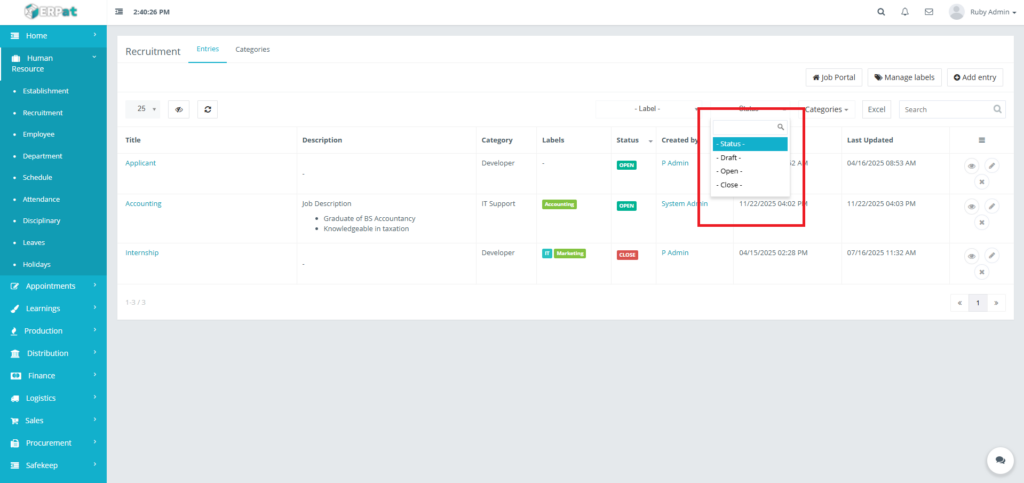
- Draft – Entry is not yet published and visible internally only
- Open – Entry is active and available for recruitment
- Closed – Entry is no longer accepting applicants
Page Controls and Tools
- Add Entry – Create a new recruitment posting
- Manage Labels – Create and manage recruitment labels
- Job Portal – Navigate to the public-facing job portal
- Search Bar – Search entries by title or keywords
- Filters:
- Label filter
- Status filter
- Category filter
- Export to Excel – Download recruitment data
- Pagination – Navigate through multiple records
- Refresh & Visibility Controls – Update and manage table view
Steps for Adding a New Recruitment Entry
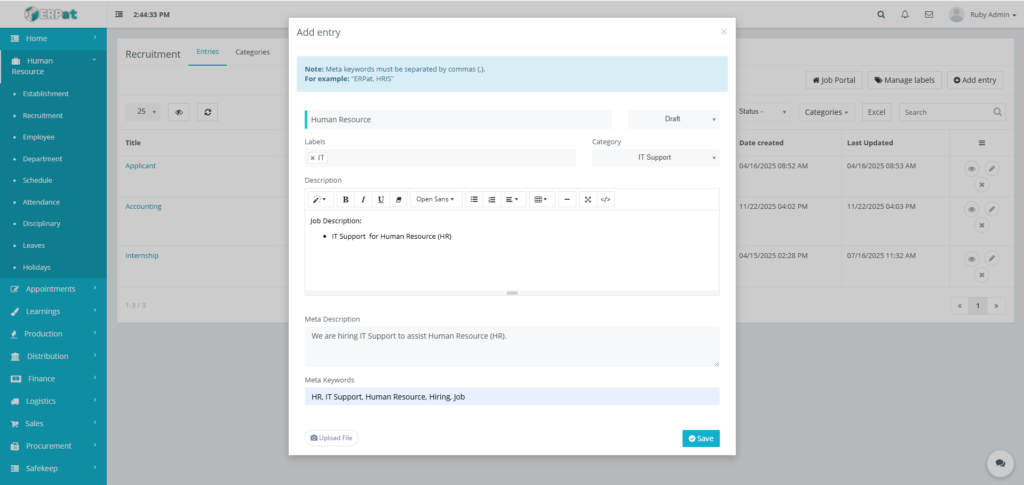
The Add Entry form is used to create new recruitment postings. This form supports structured job details and metadata for Job Portal optimization.
STEPS
- Click the Add Entry button at the top-right of the Entries page.
- Fill in required fields:
- Title (Job title or position name)
- Status
- Labels
- Category
- Description
- Meta Description (Short summary used for Job Portal previews and SEO)
- Meta Keywords (SEO keywords separated by commas e.g.,” HR, IT Support, Hiring, Job “)
- Upload File (Optional attachment job brief, requirements, or supporting document)
- Review the information for accuracy.
- Click Save.
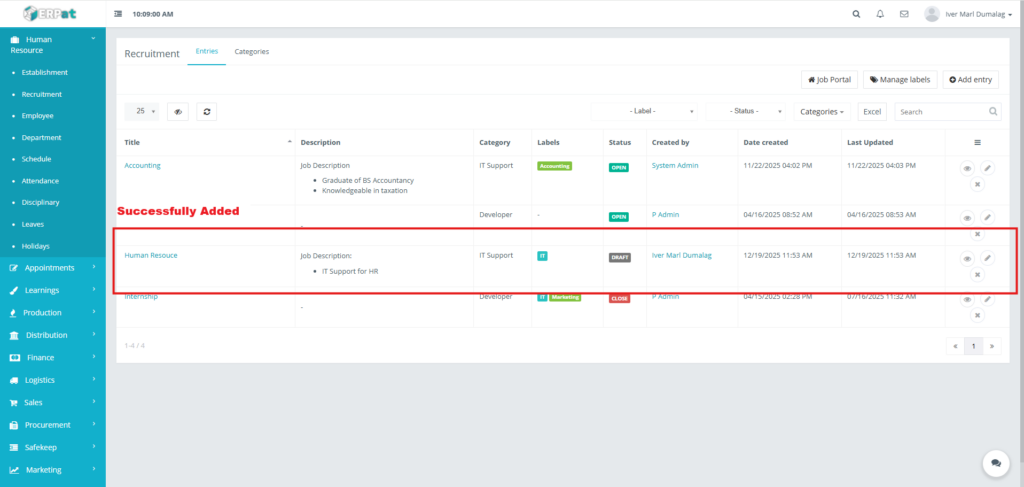
Result
The entry appears in the Recruitment Entries list.
Viewing a Recruitment Entry
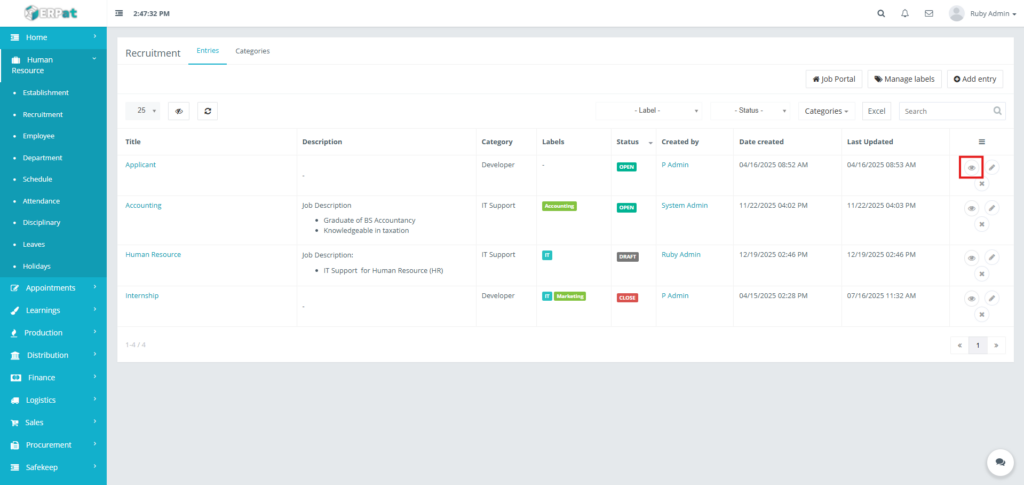
The Job Details page displays recruitment entry information. It is accessible internally and publicly through the Job Portal.
STEPS
- Locate the view entry in the listing.
- Click the View(
 ) icon under the Actions column.
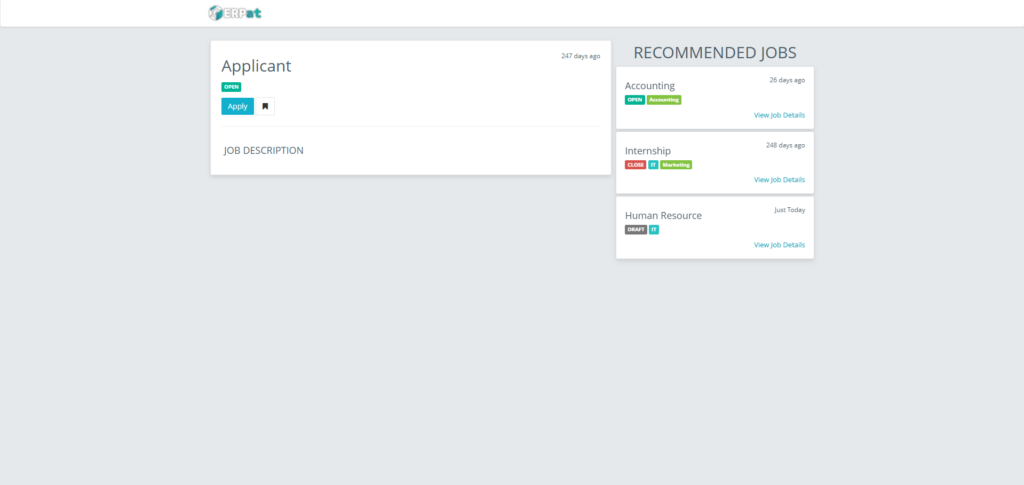
Job Recruitment Cards
The recruitment cards provides an overview of all recruitment entries with the following information:
- Job Title
- Status Badge (Open / Closed)
- Category / Labels
- Posted Date
- Job Description Section
- Actions
- Apply – Opens the Application Form (Open jobs only)
- Bookmark / Save – Save job for later reference (if enabled)
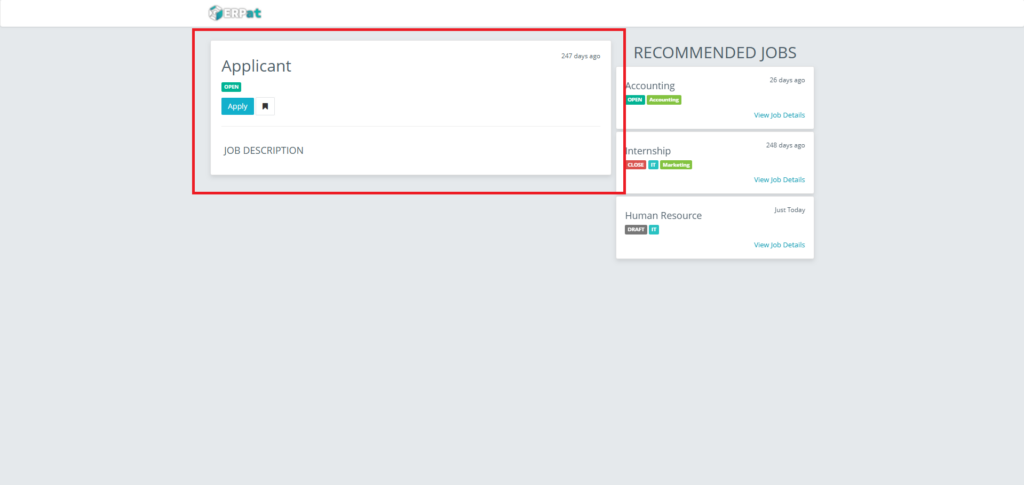
Job Recruitment Apply
- Click the Apply button inside the Job Recruitment Cards.
- Fill in required fields:
- First Name
- Last Name
- Gender (Male / Female)
- Street
- City
- State
- Zip Code
- Phone
- Upload supporting documents.
- Click Save.


View Recruitment Application
- Click and Select one Title of the Recruitment.
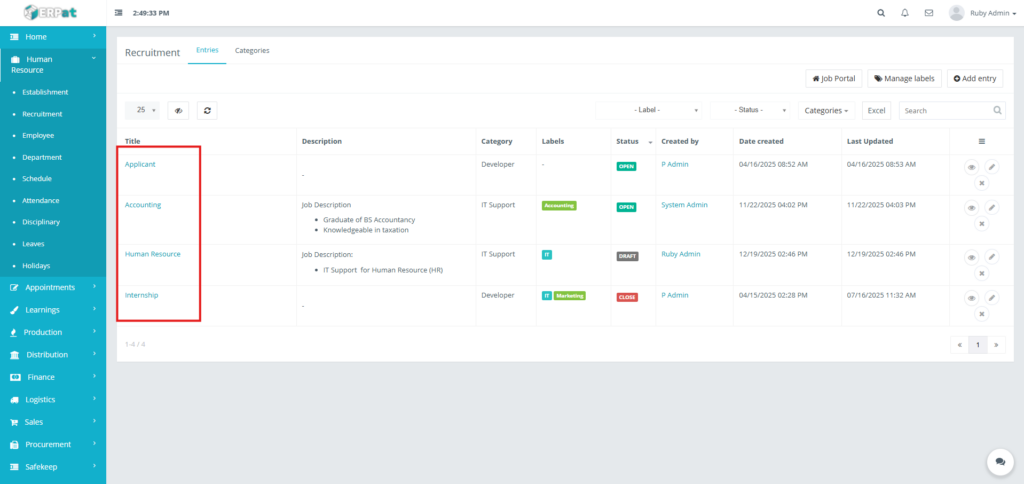
Result
Recruitment Application Listing Page is displayed.
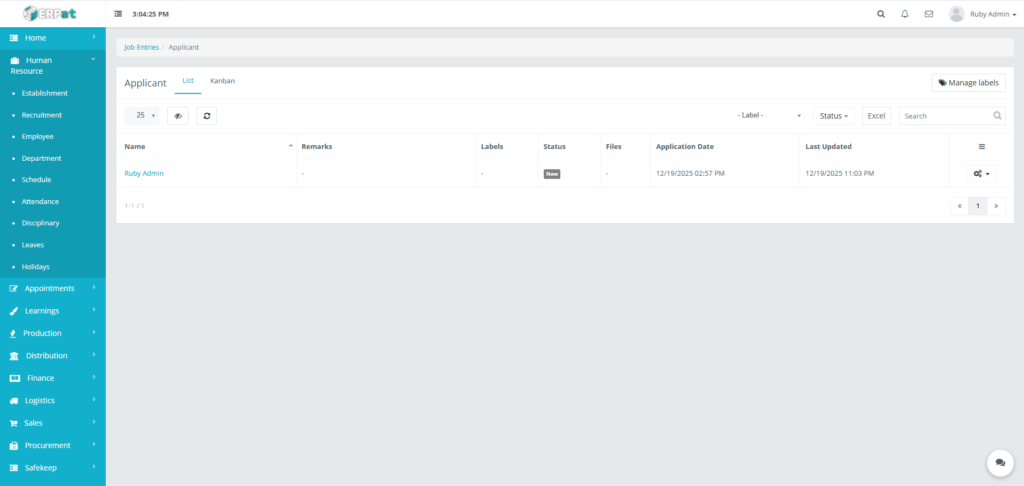
Recruitment Application Listing Page
The Recruitment Application page allows HR to manage candidates for a specific job opening. It features two primary views: List and Kanban.
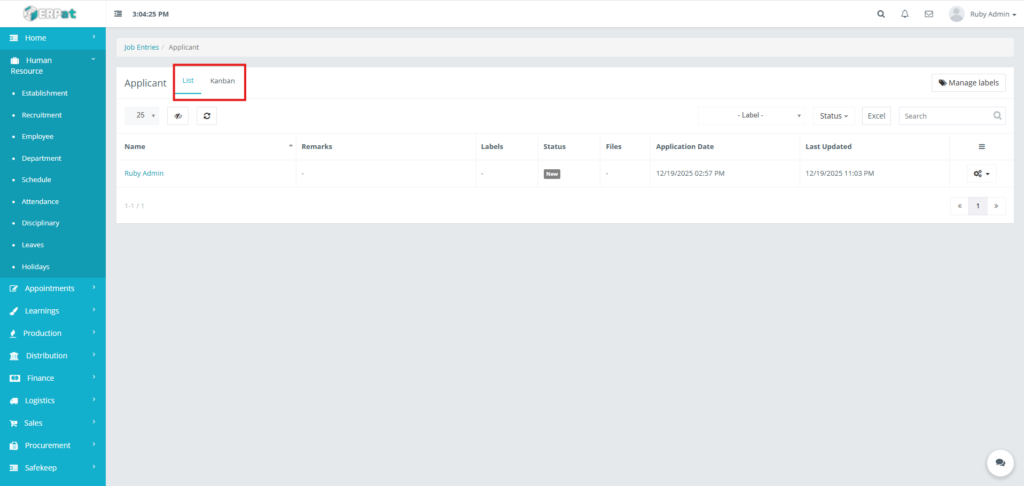
Recruitment Application List Page
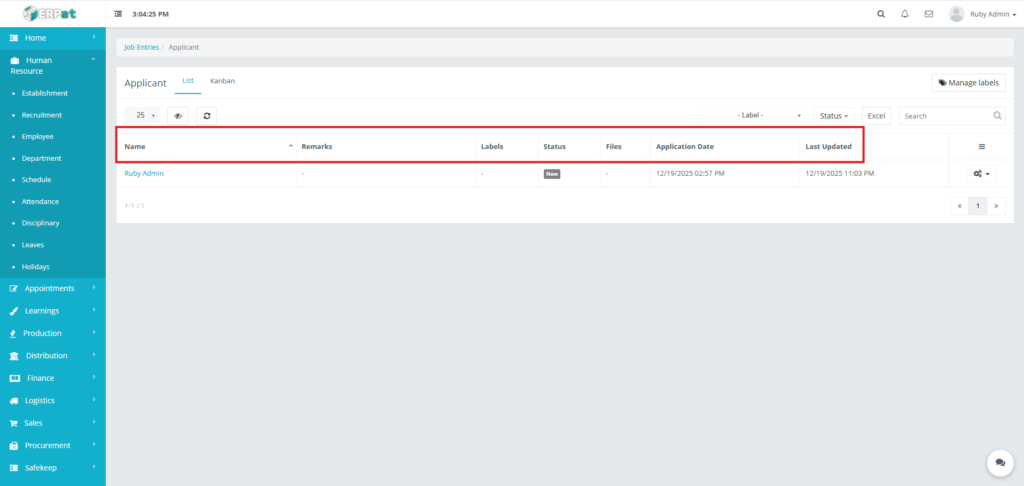
Provides a comprehensive table of all applicants with the following columns:
- Name: The full name of the applicant.
- Remarks: Internal notes or brief summaries regarding the candidate.
- Labels: Custom tags (e.g., “Priority,” “Internal”) used for categorization.
- Status: Displays the current stage of the applicant (e.g., New, Invited, Screening, Qualified, Approval, Hired, Lost).
- Files: Indicates if there are attached documents like resumes or portfolios.
- Application Date: The date and time the application was submitted.
- Last Updated: The timestamp of the most recent activity on the application.
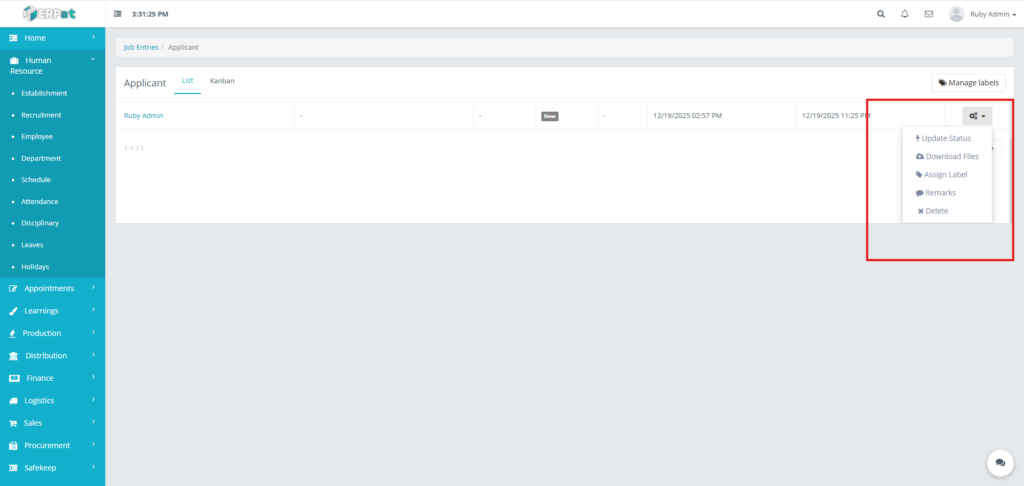
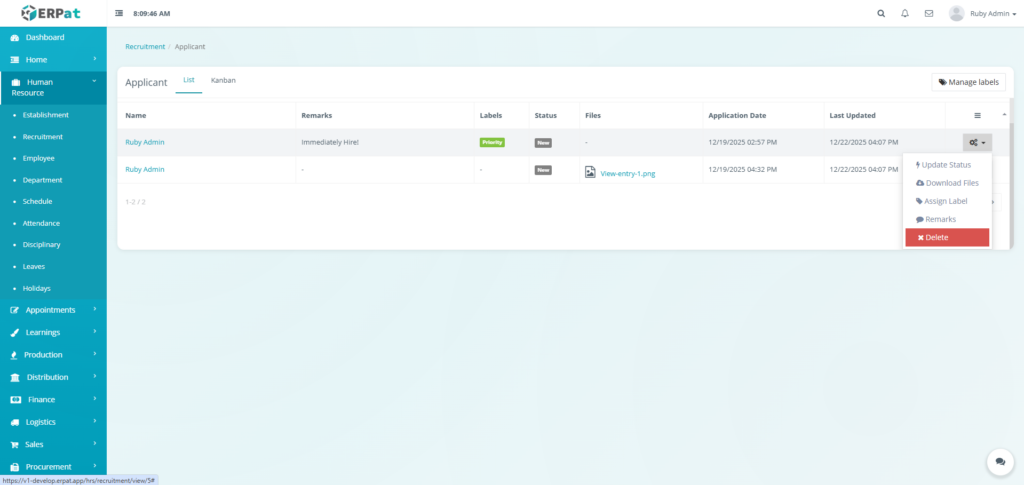
- Actions – Update Download Files, Assign Label, Remarks, or Delete controls
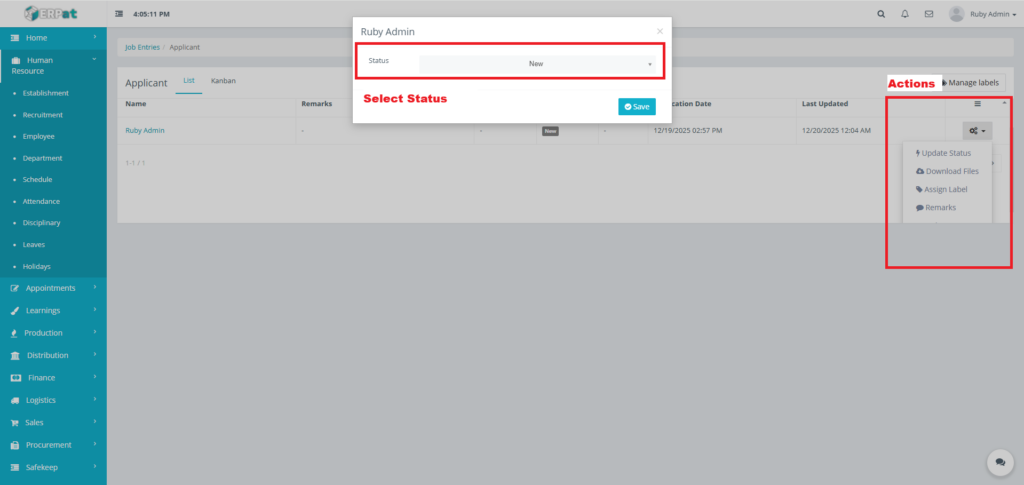
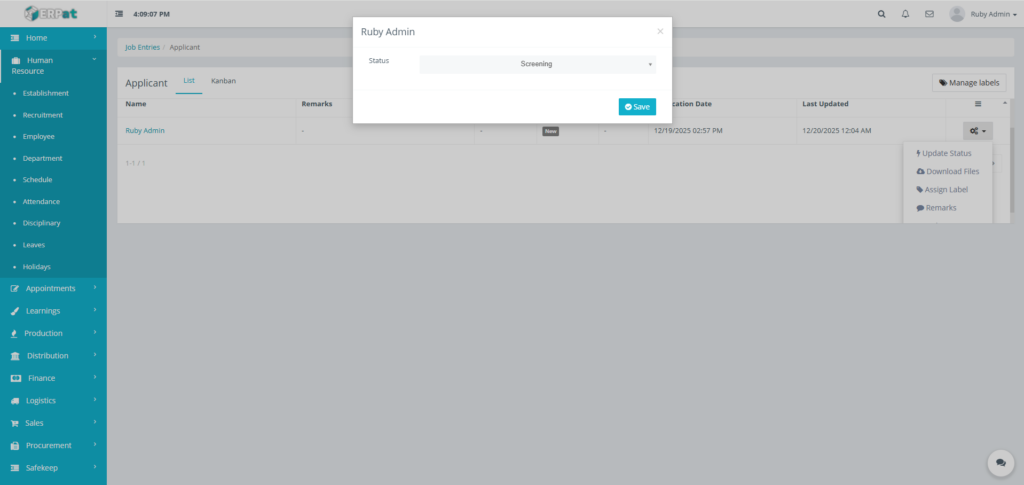
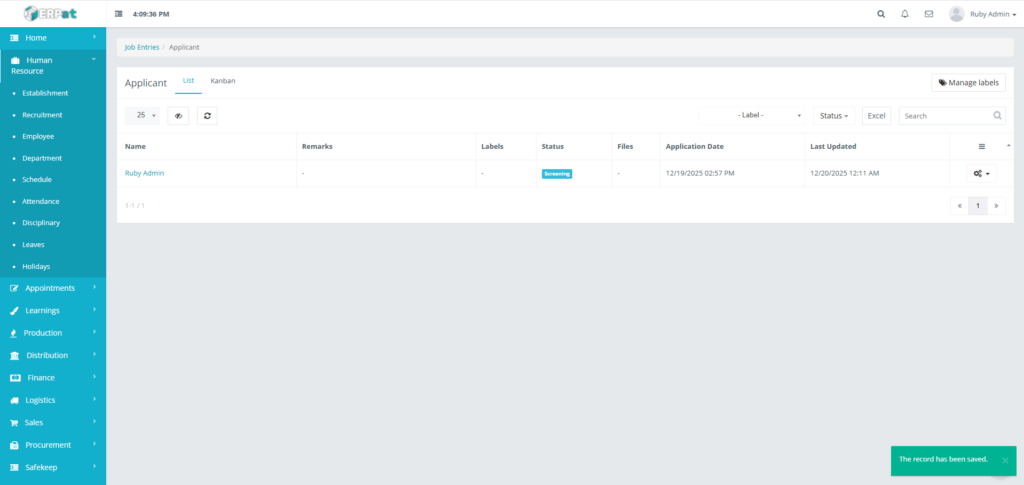
Recruitment Application Update Status
STEPS
- Locate the Update Status in actions.
- Select status of application.
- Click Save to apply changes.
Result
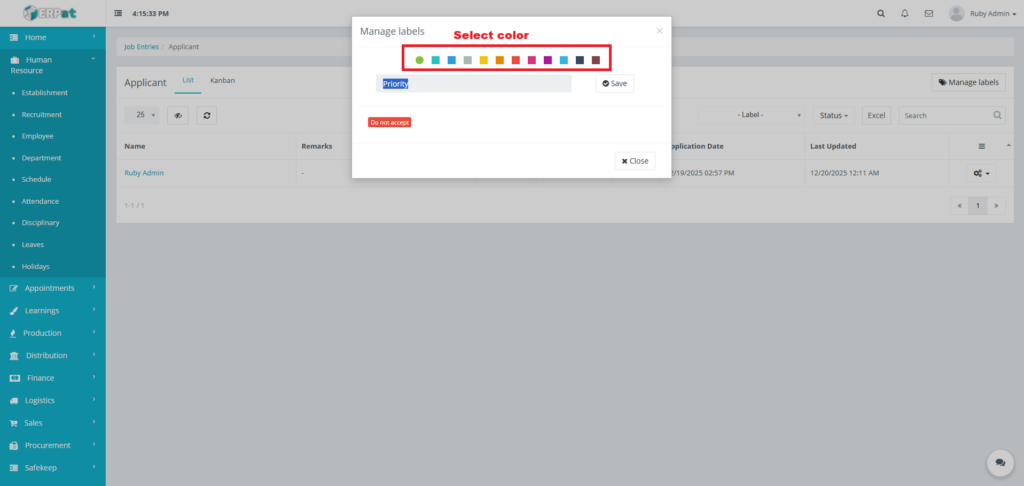
Recruitment Application Create Label
STEPS
- Click Manage labels button located at the top-right corner of the screen.
- Input the label.
- Select the color for the label.
Result

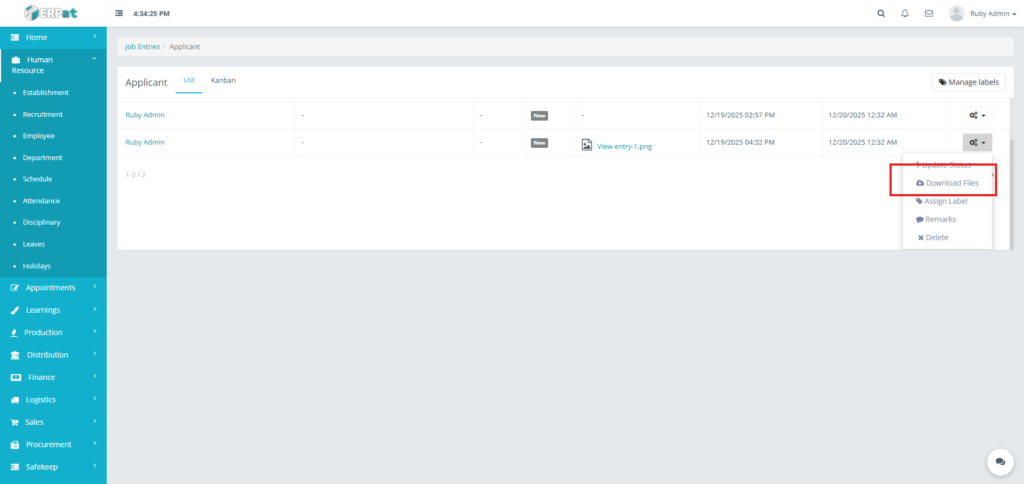
Recruitment Application Download Files
- Locate the Download Files in actions.
- Click Download Files to get a copy of the file uploaded by the applicant.
Results

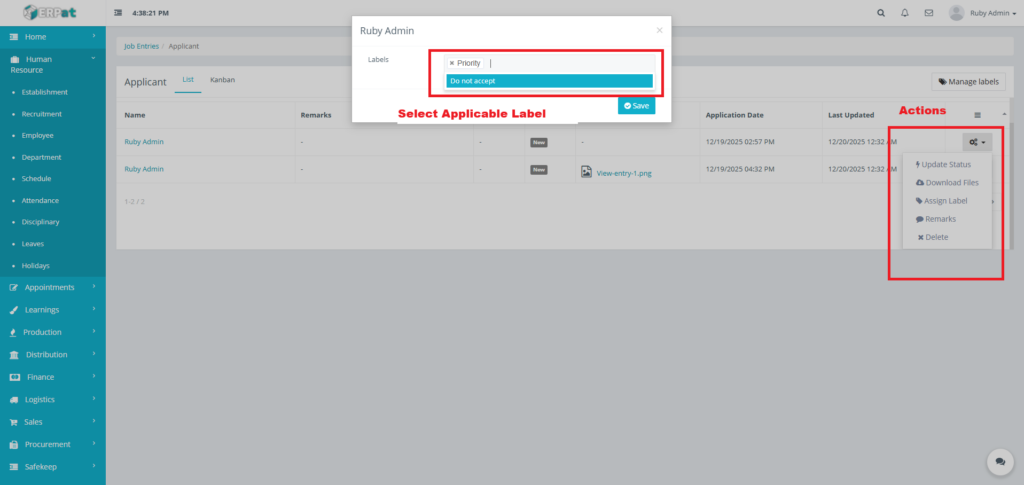
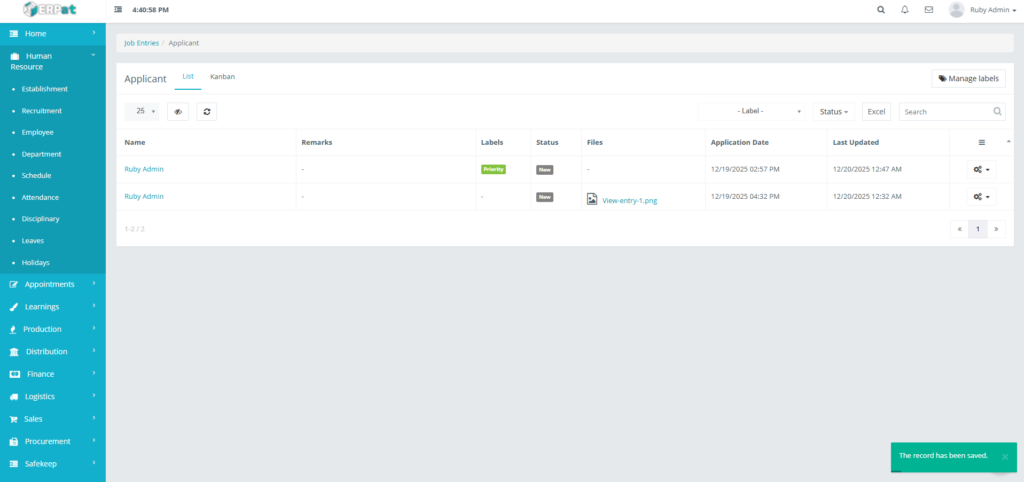
Recruitment Application Assign Label
STEPS
- Locate the Assign Label in actions.
- Click Assign Label option.
- Select Applicable Label
- Click Save to apply changes.
Result
Recruitment Application Add Remarks
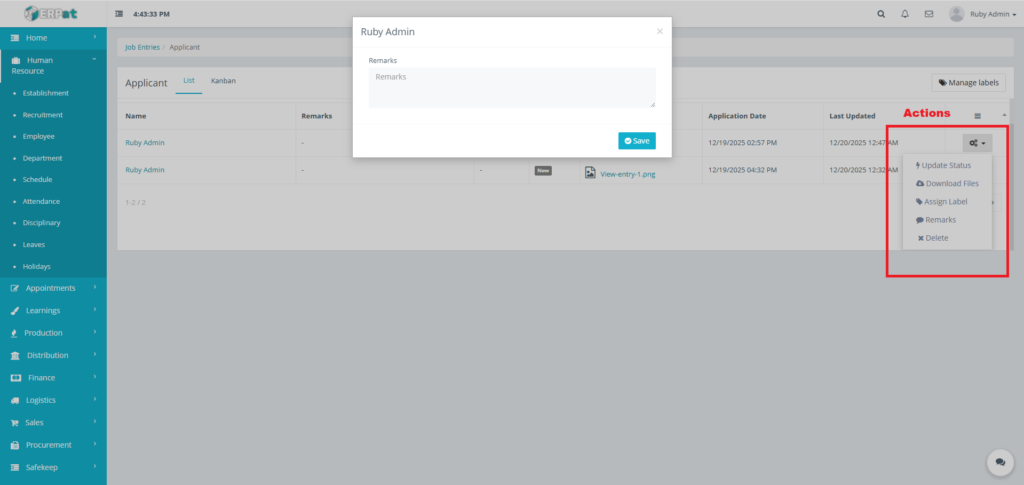
STEPS
- Locate the Remarks in actions.
- Click the Remarks in the options.
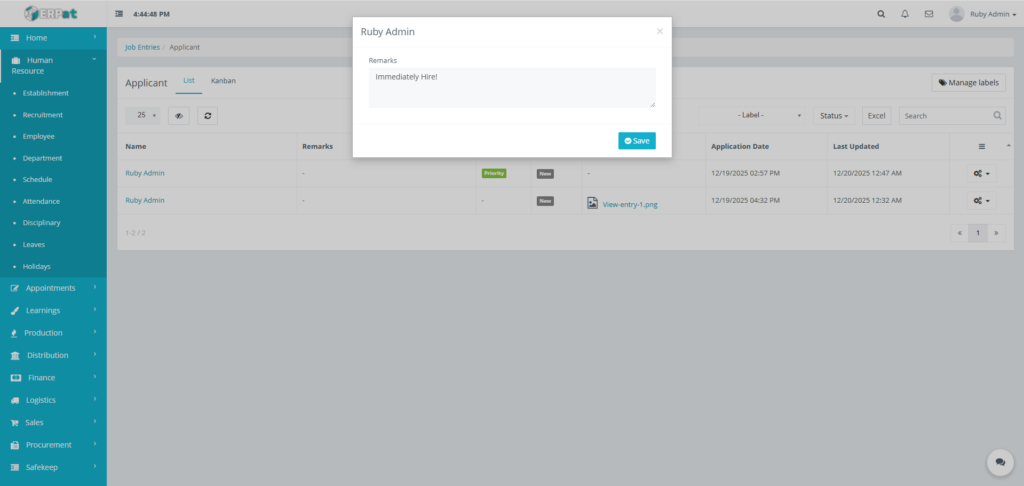
- Fill the necessary fields.
- Click Save to apply changes.
Result
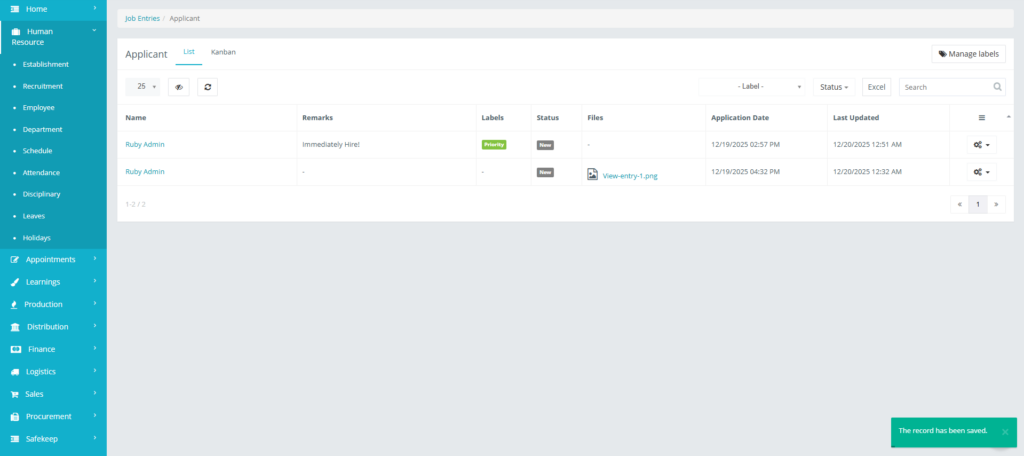
Recruitment Application Delete Application
STEPS
- Locate the Delete in actions.
- Click the Delete in Actions.
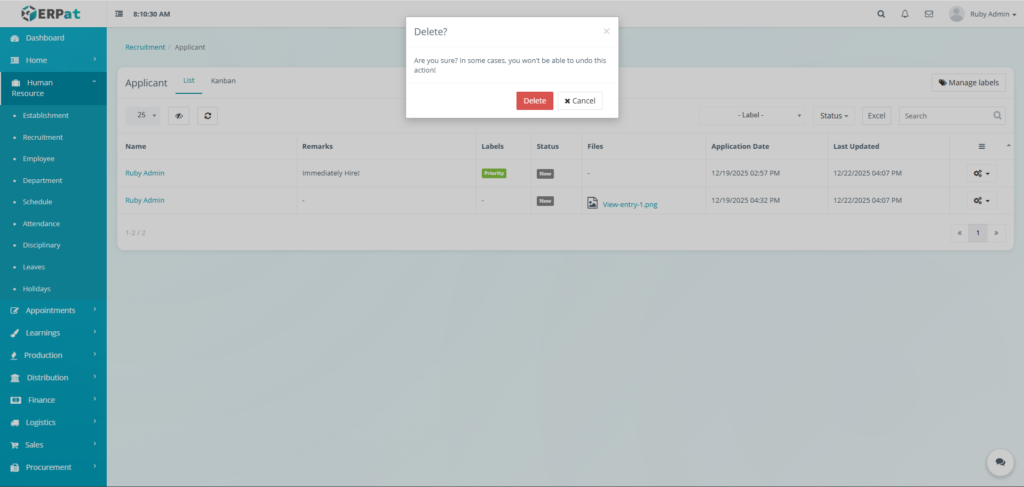
- Confirm the deletion by clicking on Delete button.
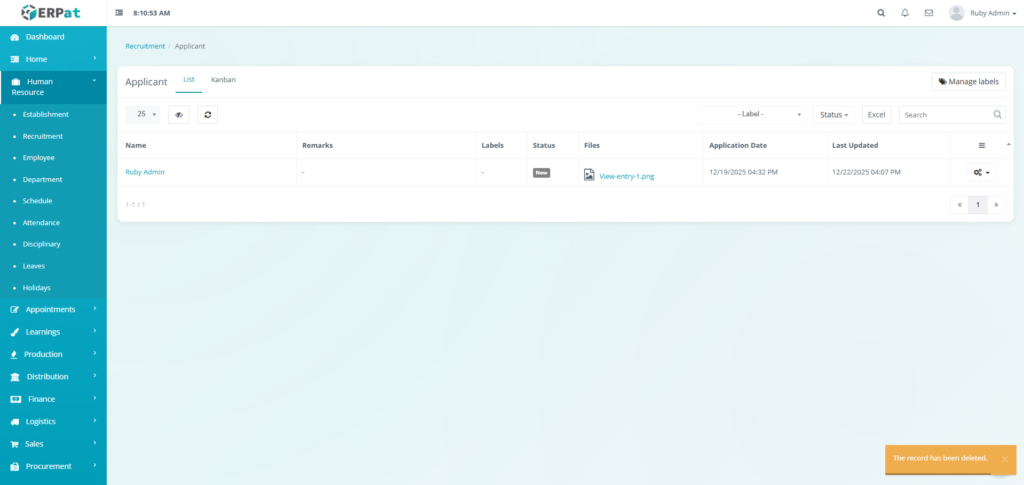
Result
Recruitment Application View Application
STEPS
- Locate the Name of the Applicant.
- Click the Name of the Applicant in the table.

Result
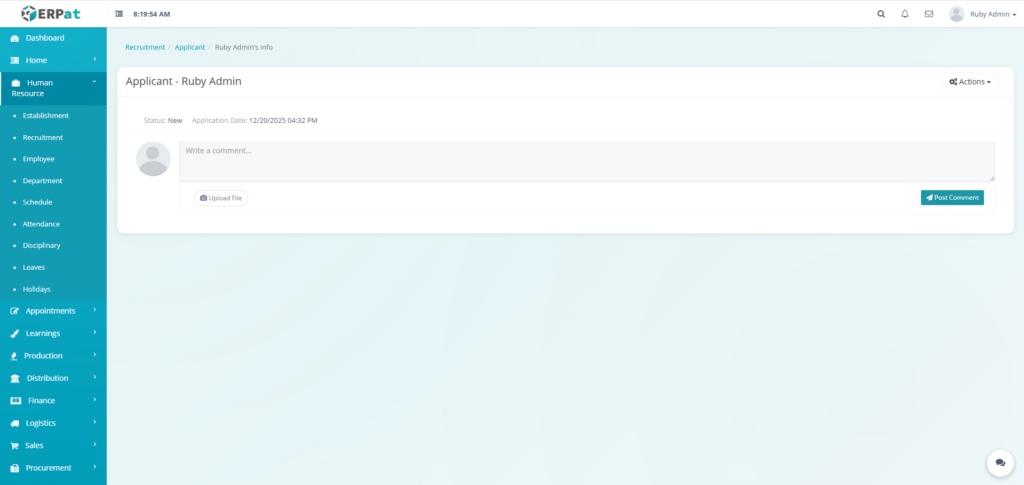
Recruitment Application View Application Comment
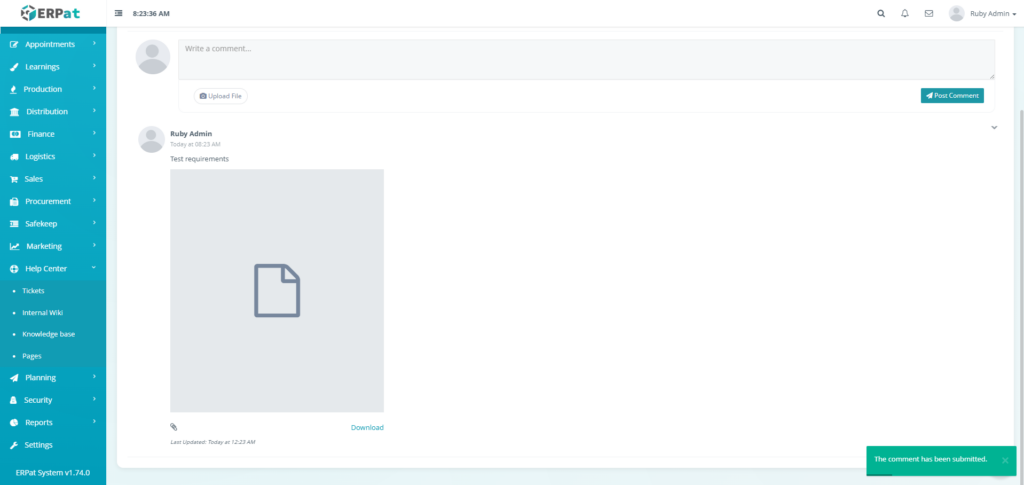
STEPS
- Fill the required fields.
- Upload the file (optional).
- Click the Post Comment button to post it.
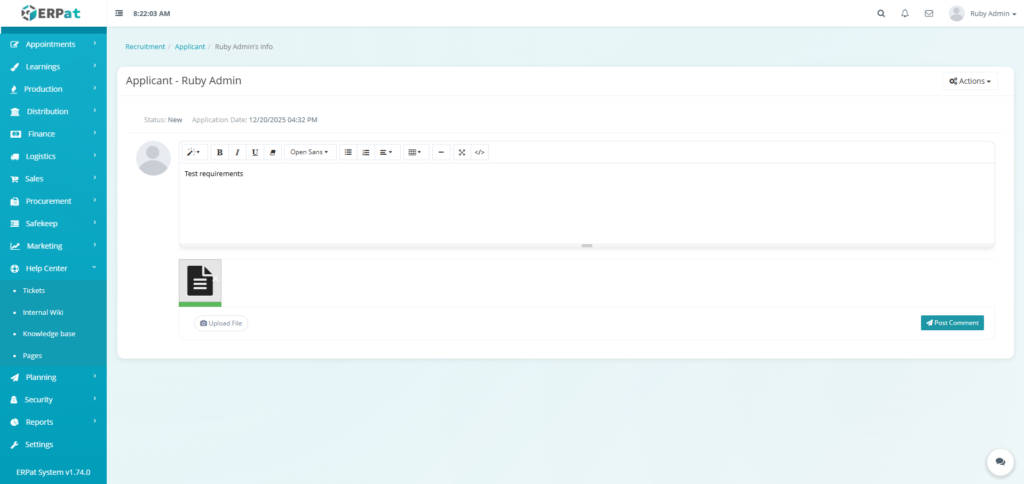
Result
Recruitment Application View Application Edit Comment
STEPS
- Locate the Edit option in the dropdown.
- Click the Edit option.
- Apply the edit.
- Click the Post Comment button to apply the changes.
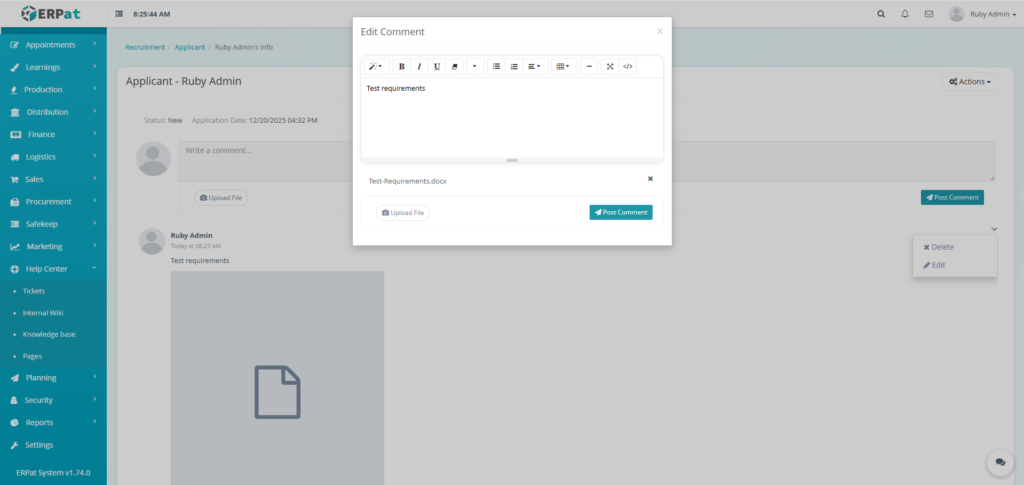
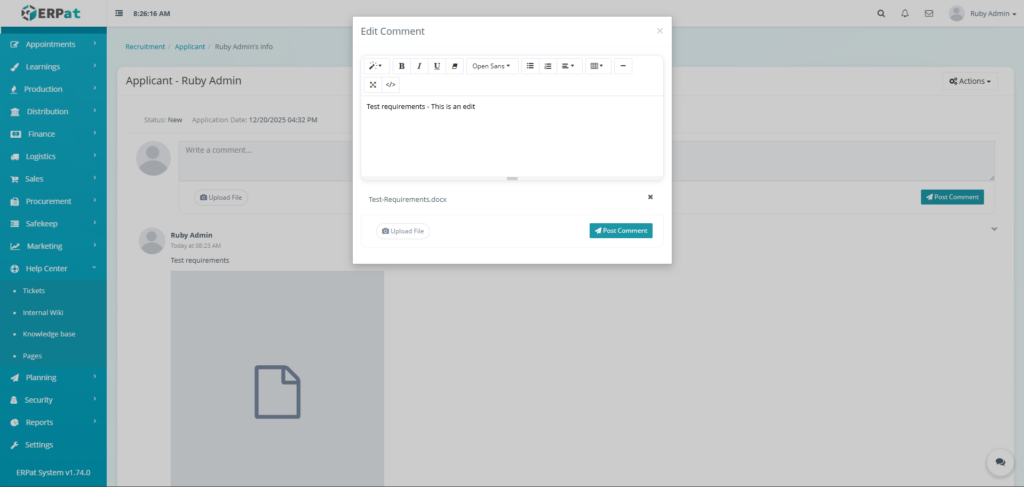
Result
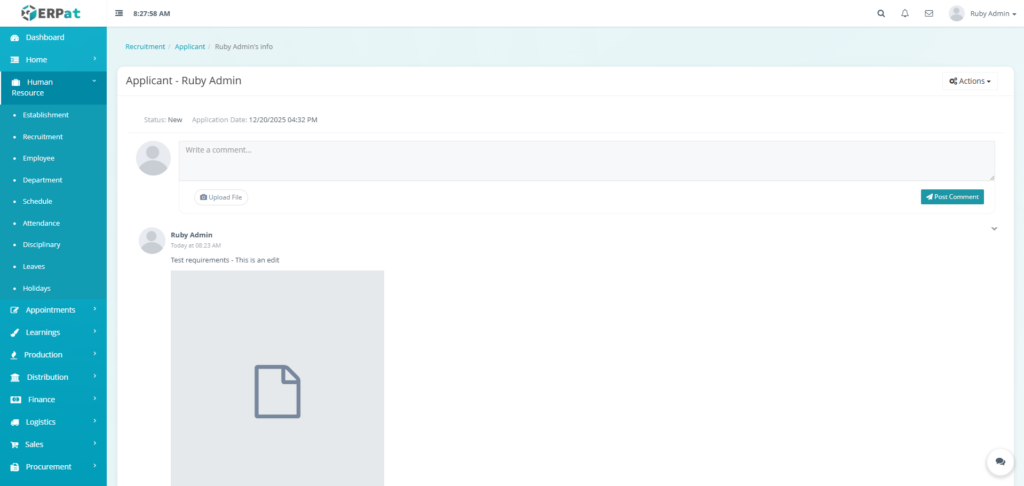
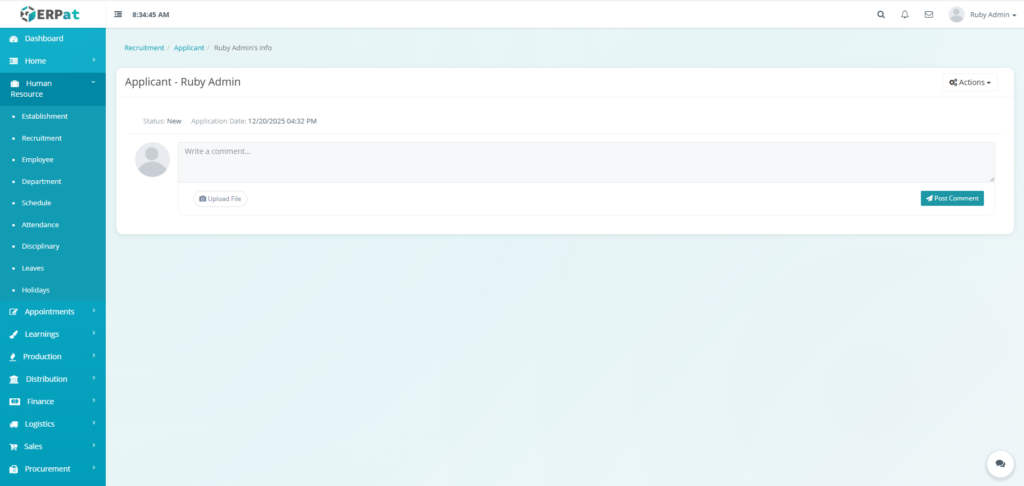
Recruitment Application View Application Delete Comment
STEPS
- Locate the Delete in the dropdown options.
- Click the Delete in the dropdown options to delete the comment.

Result
Recruitment Application Applicant Kanban Change Status
STEPS
- Using your cursor drag the selected application to their respective status by holding your left click.
- Stop holding down your left click when application is in the desired status.
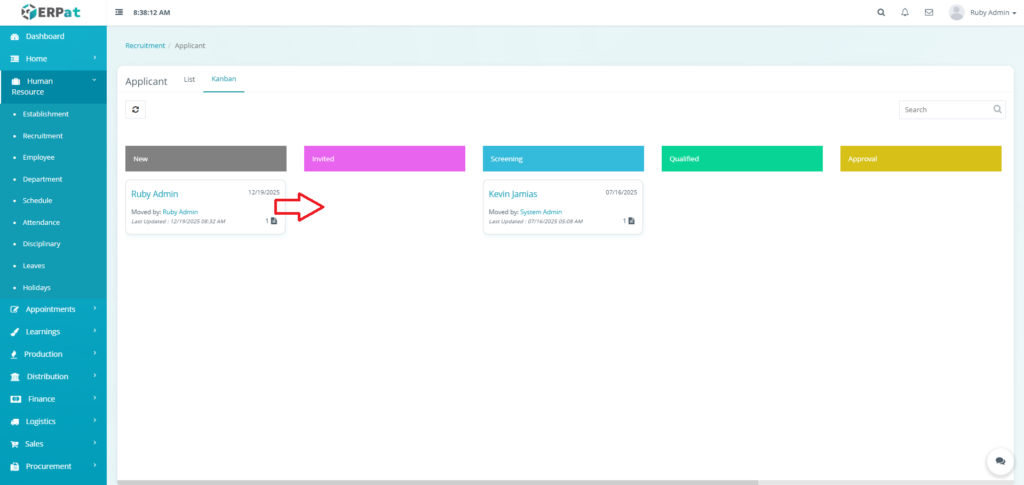
Result

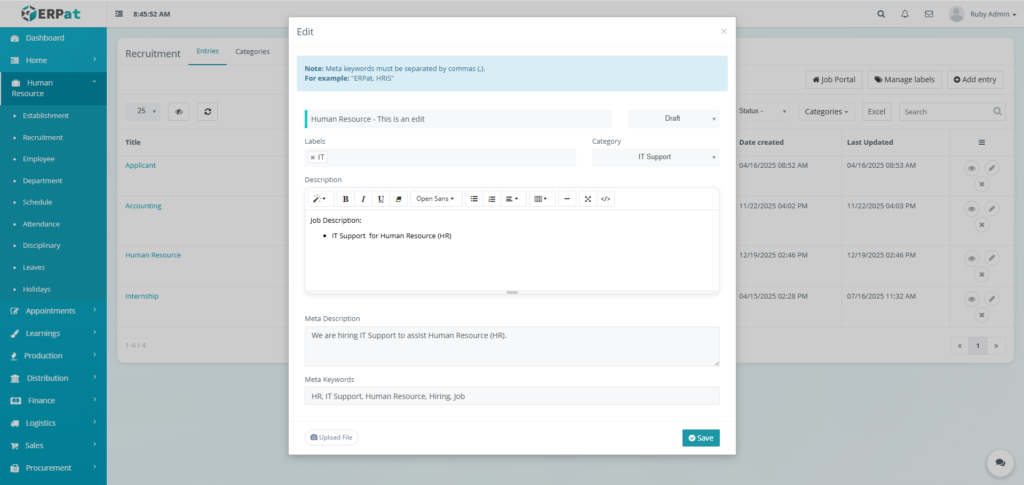
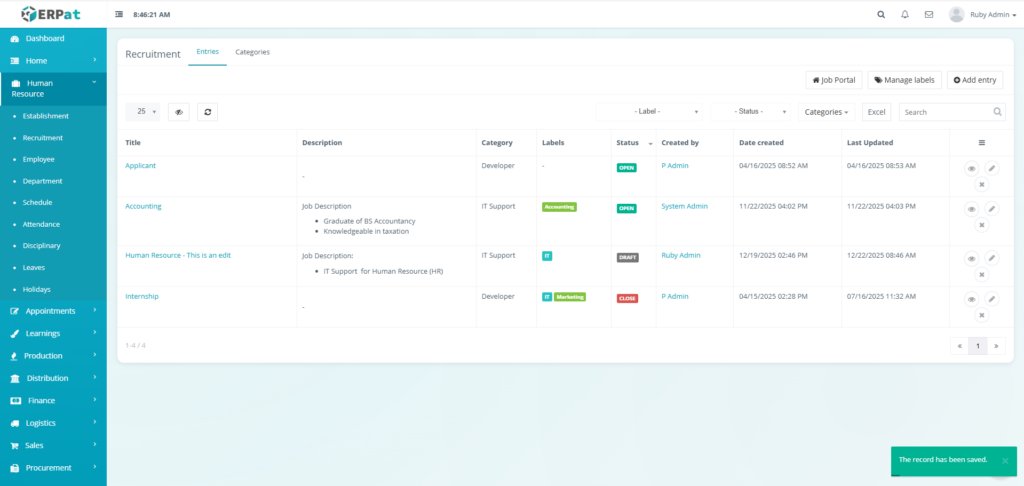
Editing a Recruitment Entry
STEPS
- Locate the recruitment entry in the listing.
- Click the Edit (✎) icon under the Actions column.
- Modify the necessary fields.
- Click Save to apply changes.
Notes:
- Changes will reflect across all linked HR modules.
Result
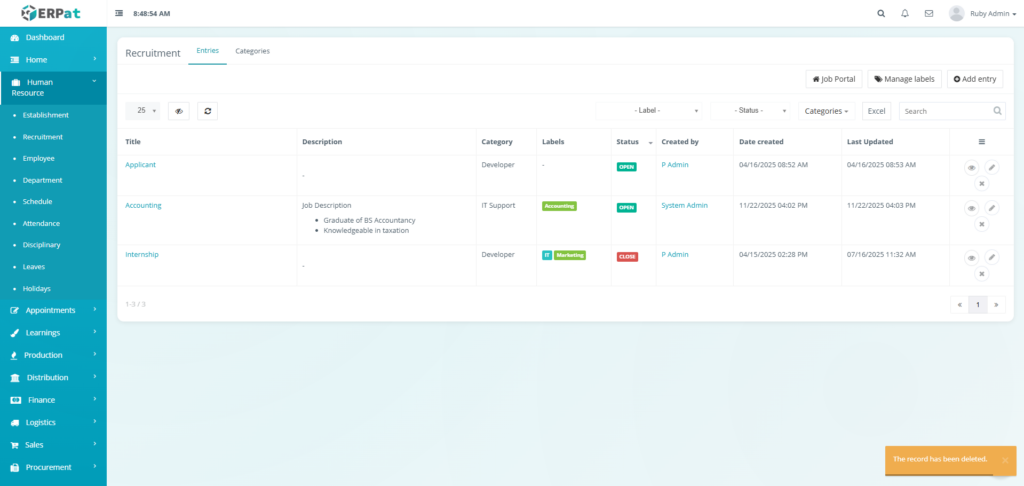
Deleting a Recruitment Entry
STEPS
- Locate the recruitment entry.
- Click the Delete (
 ) icon.
 - Confirm the deletion.

Result
Recruitment Categories
Recruitment Categories are used to classify job postings into functional or departmental groups. Categories help standardize job classification and improve filtering and reporting.
Accessing Recruitment Categories
- Navigate to Human Resource → Recruitment.
- Click the Categories tab.

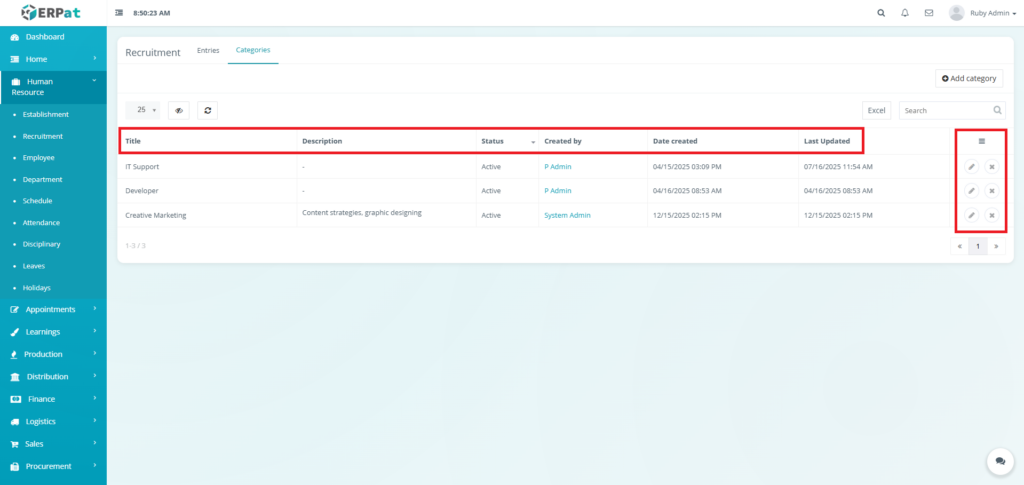
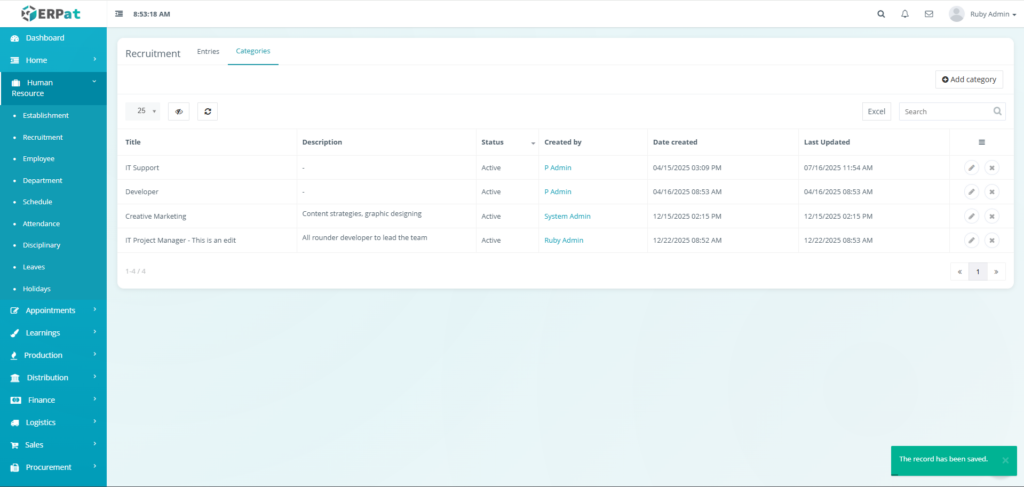
Categories Listing Page
Displays the following details:
- Title – Category name
- Description – Category scope or summary
- Status – Active or Inactive
- Created By – Creator of the category
- Date Created
- Last Updated
- Actions – Edit or Delete
Adding a Recruitment Category
STEPS
- Click Add Category.
- Enter:
- Title
- Description (optional)
- Status (Active / Inactive)
- Click Save.
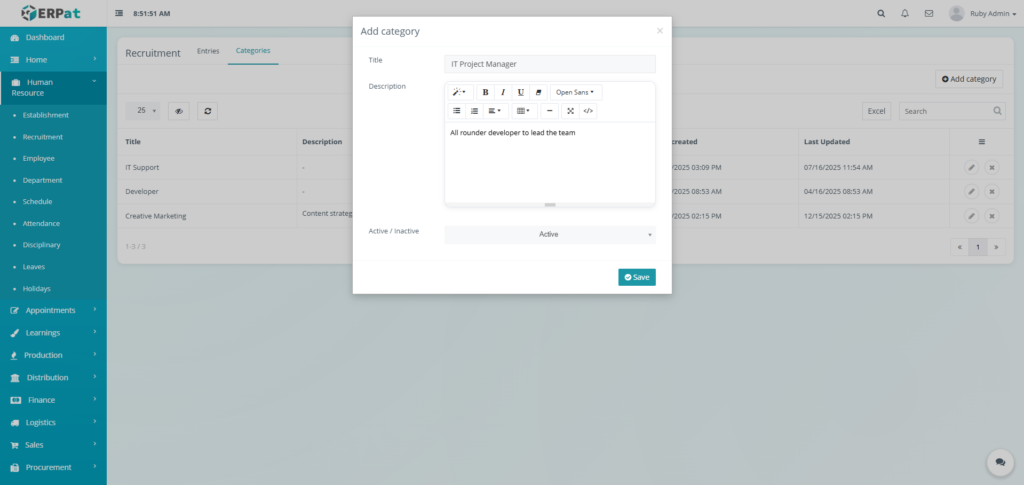
Result
The input appears in the Categories Listing Page.

Editing a Recruitment Category
STEPS
- Select the category.
- Click the Edit (✎) icon.
- Update the information.
- Click Save.
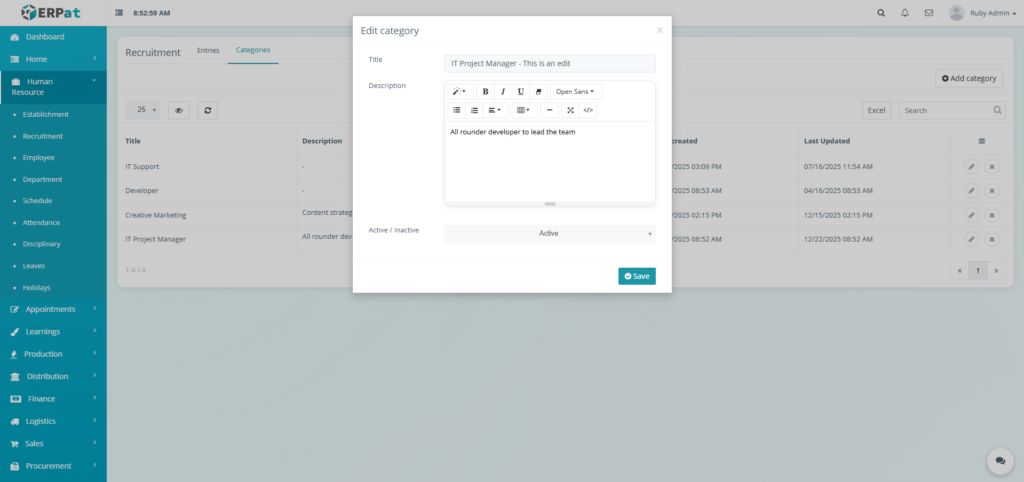
Result
Deleting a Recruitment Category
STEPS
- Locate the category.
- Click the Delete () icon.
- Confirm deletion.
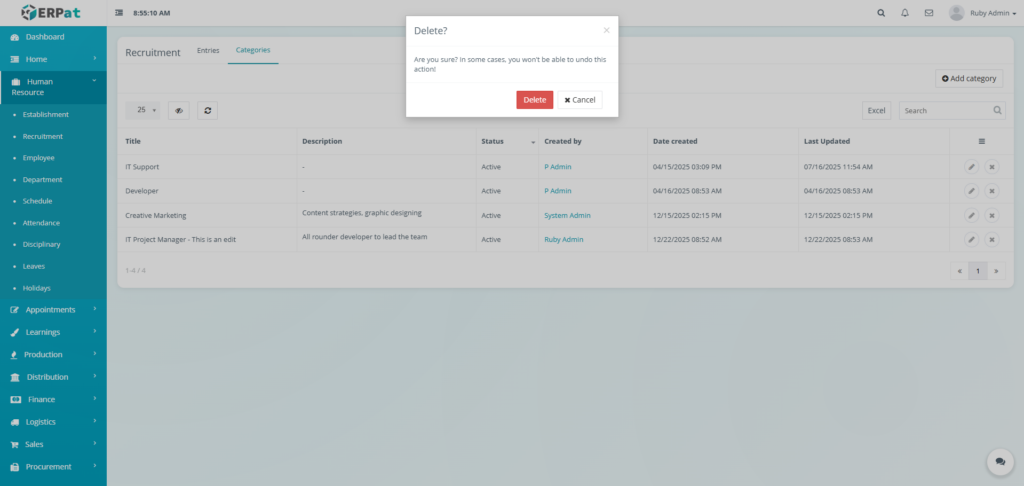
Result

Permissions and Access Control
- Only authorized HR or Admin roles can add, edit, or delete establishments.
- View-only access may be granted to supervisory roles.
Best Practices
- Use standardized job titles and categories
- Keep job descriptions clear and concise
- Use labels consistently
- Close recruitment entries promptly after hiring
- Avoid deleting records needed for audit and reporting
Audit & Logs
All recruitment-related actions (create, update, delete) are logged for audit, compliance, and traceability within the ERPat System.